A3 - Documentation

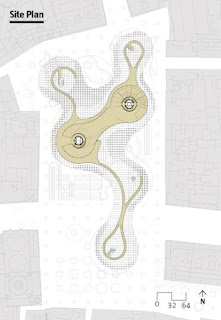
Model 01 - Metropol Parasol - 1: 200


Size: 750mm length  X 375mm width X 140mm height 
Material: Basswood 1.5mm Thick
Technique: Laser Cutter
Pieces: 158

Step 01 : Digital Model Making


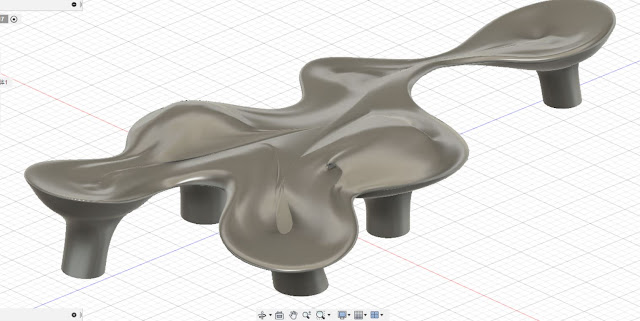
The digital model made in Fusion 360 and used the real project plans, elevations and sections as a reference. The tool of this model choosing to use create form which is able to create the free form as you want in Fusion 360. 


Step 02: Slice the Model to Interlock Structure


For this step, the Slicer for fusion 360 was chosen to create this structure. This is a powerful tool for Fusion 360 to create the slice structures by adjusting the parameter on the left side and it will provide the pieces sheets on the right side for preview. 

   Step 03: File for Laser Cutter 


The Slicer will provide the files for laser cutter, output this file to Rhino and preparing to laser cut.  10 X 800mm X 450mm X 1.5mm sheets are used for this project.

Step 04: Assembly

158 pieces are created for this project.

The assembly tips:
1. More than enough space for pieces intersection.
2. Always from bottom to top.
3. Always from "Trunk" to edges.
4. The connections from "tree" to "tree" are extremely fragile, be careful with it.
5. The number of each pieces should be clearly assigned in oder to finding where do they belong to. 


Model 02 - RGS centre in University of Monterrey - 1:500

Size: 198mm length X 54mm width X 64.8mm height
Material  & Techniques:  
Mould: CNC - Multicam Router - Blue Foam
Model: Casting - Plaster

Step 01: Digital Mould Making


The digital model was made in rhino because rhino has a good ability for editing curved surfaces and the good connection between different surfaces. This project has two twisted surfaces and both need of them need to connect with flat surfaces. Therefore Rhino is good choice for this project.

Step 02: Physical Mould Making


CNC - Multicam Router is chosen for the mould making with blue foarm, the reasons are:

1. CNC used the small diameter tool could make really delicate curved surface.

2. The tool path work on the surface will left the texture, and this texture is considered to use as the real texture of the surface patterns of the project.

3. The CNC work well with foarms, the foarm is a good material for casting mould because it is easy to be cut.


Step 03: Preparing Plaster


Always put the plaster into water, and keep stiring with pour the plaster until the mix has a cream-like property. And then could add the color power to make the grey color to close to concrete color. 


Step 04: Casting


Fill the plaster and put overnight, the time depends on the properties of the plaster, if too wet, the plaster need more time to be dry. 

Step 05: Take Out the Model


    Cutting the mould to small pieces and one by one to seperate with the model body.


Model 03 - CIRRATUS VASE - 1:2

Size: 200mm length X 200mm width X 300mm height

Material: Stoneware Clay

Technique: 3D Pottery (Ceramic Printers)

Layers: 150


Step 01: Digital Model Making


The digital model was made by Rhino with the reference drawings, the reason used Rhino is because the oganic shape is easy to control in Rhino by using Loft tool. 

Step 02: Try and Adjust the Digital Model


The first try is fail because 
1. bottom is too small, and the top is big.
2. The transition in the middle too big to the clay collapsed.  


     The second try, I adjust the digital model to satisfy the clay properties and printed up side down to let the big part on the base, then the whole project was successfully processed.  


Step 03: Wait and Complete


    Waiting for the clay be dry and hard, then revise the project up side down, and add a base. 

Step 04: The Limitation


     1. When the machine changed the layer, it will left the mark to influence the appearence.
     2. After adjusting the model to satisfy the machine to successfully process, the original shape will be changed. 


Comments

Popular posts from this blog

A2 - FABRICATION

project matrix Ben Shen z5243949